Saturday, December 3, 2011

Cricut Craft Room's 100 Cart Blog Hop - Day One

You should have come from Karey. 


Due to a personal family emergency, I am unable to participate, however, please continue the hop at Yvette  and see the wonderful things she has made for you.


Here is the entire lineup for today if you get lost:


• My Cricut Craft Room http://mycricutcraftroom.blogspot.com/
Melissa http://pinkpolkadotscrapping.blogspot.com/ - santas villiage, trim the tree, gingerbread, VERY MERRY TAGS
Jen L http://mybusycraftylife.blogspot.com/ - Mickey and Friends , Mickey and Friends Font , My community , Christmas Noel
Jenny R http://myimagitivity.blogspot.com/ - Art Philosophy, Hello Kitty Greetings and Kate's Kitchen
Heather S http://operationcricutdesign.blogspot.com/ - Songbird and Tie the Knot, Create a Critter
Laura http://laurascraftsandmore.blogspot.com/ - Groovy Times, Christmas, Joys of the Season
Lisa www.allmadebylisa.blogspot.com Word Collage & Quarter Note
Karey http://www.creativecraftcorner.com/ Handy Man Cricut Lite Cartridge, Just Because Cards and Freshly Picked
Suzy's Crafts http://suzyssimplecrafts.blogspot.com/ - Sophie, Fancy Frames, Sophisticated, Sweethearts
Yvette http://gammascreativecorner.blogspot.com/ - Snow Angel and Storybook
http://ericasblogcandy.blogspot.com/


Monday, November 21, 2011

Card Creating Tuesday


Welcome to Card Creating Tuesday. If you have not come from Erica's Blog, please stop over there to check out all the wonderful cards the Design Team has made today. They are so creative!

I made two cards today for you!  The first was made using a premade card from Hobby Lobby.  I added a blue background from some paper I had in stock and then added some Jillibean paper. This paper is so bright and colorful. Such a fun paper to work with.  Using Pink By Design Stamps, I embossed the image and "Happy Hooliday".  I then added a spellbinder Christmas Border.  Using one of my Favorite carts, I cut two trees from Celebrate with a Flourish and some matching paper.  It is whimsical. :) Hope you like it.


Secondly, I made another card, this time using BoBunny paper. I really love this paper. Again, using a premade card, I took two sheets of different BoBunny paper and using my Xyron, added them on the card. I found this Green ribbon yesterday at Michaels and just found it so pretty with the little snowflakes on it. After I used the paper punch edger, I inked it up, and added some Bling with my Irock that I found when cleaning my craft room. (Amazing how that happens. :))  My ornament is from Scandinavian Christmas cartridge and I thought it just matched so well. I again used Xyron to put all the little pieces together. In fact, I am going to enter this in the Xyron contest and I hope you will take the time to vote for me.


So that my projects for today. Hope you enjoy and stop by again soon. 

Suzy's Crafts

Sunday, November 13, 2011


Welcome to the Giving Back Blog Hop!  We wanted to give back to the person who has given so much to us! 
  
So, this is in honor of Erica from My Cricut Craftroom.  

 You should have come from Gayles blog. If you are starting at my blog, you will want to start with Kat’s Blog so you don’t miss any of the great layouts.   When you get done hopping, you will want to go to Erica’s Facebook Page  and leave a comment on her page.   We will be randomly selecting someone from those comments to win blog candy.

I first met Erica about 6 months ago on FB. Although I'd had my expression for about 2 years, she really helped open my eyes to all the possibilities available with the Cricut. Yes, she was giving prizes and that was what originally enticed me, but in a very short time, I met many wonderful crafty ladies who are so talented and I think of as friends. Erica being the one who originally arranged this and made me get off my duff and use my Cricut, create a blog and start sharing what I make.  LOL - that is very scary in the beginning, wondering how people are going to critique your stuff and seeing all the other amazing talent out there.Oh my goodness, she put me on her first Design Team I almost passed out from fright!( Erica did not take no for an answer)  But we got past that and now I could not imagine not being a part of this very talented group of ladies.

I finally met Erica in person at a Circle crop in Ohio. Yes, she even made the Circle sound so awesome, I had to have it. LOL And I have not regretted it yet. My family thought I was crazy going to meet someone off Facebook, but I met the best ladies there. Kat, Amanda, Emily, and Ricki.  We stayed up late into the night making crinkled ribbon(oh the mess) and learning so many new things. It was one of the best times I've had. 

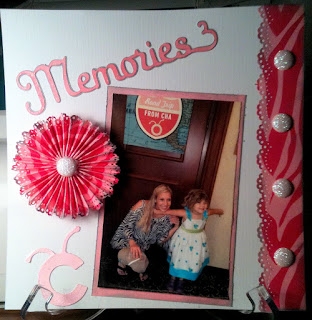
This picture was taken as we were going into the Crop event. Yes,  Bella is a Circle member..I'm sure the youngest. :)  And she is such a sweet little girl. She was a pleasure all weekend and very well behaved.

Thank you Erica for the wonderful memories of that weekend. And thanks for all you have done since then. You are a true friend and I hope to be able to get together again soon. 


The next stop on the hop is Rosa's!


The entire lineup in case you get lost is listed below.  

http://katscrapfever.blogspot.com                 
http://papercrafteranonymous.com                 
http://pinkpolkadotscrapping.blogspot.com   
http://grammiejudys.blogspot.com                 
www.lezlyes.blogspot.com                            
http://gscraptime.blogspot.com                            
http://suzyssimplecrafts.blogspot.com        

http://kleymanr.blogspot.com/                       
http://cema1cema.blogspot.com                   
http://www.funkycards.blogspot.com/             
http://micraftygal.blogspot.com                     
http://nonnascraftcorner.blogspot.com/           
http://samanthascricutcreations.blogspot.com/ 
http://manicexpressionsdesigns.blogspot.com/ 
http://sweetpsscrapbooks.blogspot.com/         
http://craftsbyamanda.blogspot.com               
http://conniescraftycloset.blogspot.com           
http://craftyandgreen.blogspot.com               
http://allmadebylisa.blogspot.com                   
http://mississippihippycrafts.blogspot.com       
http://kccroppers.blogspot.com                      
http://www.creativecraftcorner.com             
http://www.lauriecandoit.blogspot.com   
        

Tuesday, November 8, 2011

Card Creating Tuesday

Welcome to Card Creating Tuesday. Our design team has made some wonderful projects to share with you today. So don't forget to stop over at My Cricut Craft Room to check out their creativity! 

My card was made using the Christmas Cartridge. This is a solutions cart but I think it has so much potential. The little snowflake fit just perfect with this paper. And what beautiful paper the Bo Bunny Blitzen collection is!

Both snowflakes were cut at 2 inches. One is using the regular cut shadow and blackout. The other was the same image using the shift key for the regular cut, shadow and blackout. I added some inking around the edges and some embossing to add a little sparkle and a pearl touch to finish them off. 


The ribbon was some that we did while at the Ohio Circle Crop using glimmer mist. We had such a fun time and a big mess. LOL  But it was such a great time and I hope we get to do it again. I made some great friends.

Items used:


Cricut Christmas Cartridge
Bo Bunny Blitzen Small Paper Stack
Martha Stewart Inks
Embossing powder
Homemade ribbon using glimmer mist. :)
Tim Holtz dye used around the edges of the card and to color the paper swatch.
Stampin Up Stamps


Thanks so much for stopping by. Hope you are having a wonderful week!


Suzy's Crafts

Monday, November 7, 2011

Imagination Monday

What a big weekend with a Fabulous Blog Hop! It was so fun and I loved all the wonderful comments on my projects. Thank you so much for joining us. 

Now on to today's Imagination Monday...Welcome and I hope this brings a little sunshine to the start of your week. I am a designer for My Cricut Craft Room and here is my project for today. I recently acquired the Teresa Collins Baby Boutique cartridge and absolutely love it. I made this card and inked the edges using Martha Stewart inks.  The cuts were made at 3.75 inches.  Added a touch of some ribbon I had around and here it is. That's the magic of the Imagine- very simple and easy to put a cute project together quickly. Hope you enjoy. 


Don't forget to go over to My Cricut Craft Room and check out the other wonderful projects my team members have made.


Have a Great week and thanks for stopping by!


Suzy's Crafts

Saturday, November 5, 2011

Welcome to our 100 Cart Blog Hop

Welcome to our 100 Cartridge Blog Hop! This is a two day Blog hop so come back tomorrow for even more fun projects from other members of the team!


You should have come from Heather, if not, please hop on over  to Erica's Blog so you don't miss out on any of the fun.


Today I have used several cartridges. My first layout, I used Forever Young.  I made this layout with a picture of my daughter in mind and if I can find it soon enough, I will add it and post another picture.


My second layout, I used Art Nouveau, Plantin Schoolbook and Celebrate with a Flourish. When my children were young, we would visit my in laws small farm and one of the animals they had were peacocks. They were so beautiful! They are long since gone but I really loved this peacock and the beautiful colors on the Art Nouveau cartridge.  


Hope you enjoy my projects. Now hop on over to Tracy who has some more awesome projects to share with you. 
If you get lost along the way, the lineup is listed below for 
your convenience. :)  

And don't forget to stop by tomorrow for the other half of the
lineup. The ladies have some wonderfully creative projects 
to share with you!

Thanks for hopping by. :)


Suzy's Crafts

Sunday, October 30, 2011

Imagination Monday

Today is Imagination Monday over at My Cricut Crafts Room.  I just received Baby Boutique and while playing with it put together this layout for my granddaughter. I want to note it was a cartridge I won from Erica! And I just Love it!!

After printing my own paper, yes I printed this gorgeous paper from one of the prints on the cartridge,  I cut the "Precious" at 2.5 inches and the frame at 3 inches. I did not do the top layer as I wanted to use this space for journaling.  The larger frame was cut at 7 inches.
I can't wait to find a perfect picture to put in this space. I think I will add a few more embellishments too.  


Suzys Crafts

Thursday, October 27, 2011

New Fancy Title :)

Some of you may have noticed the change in my new title. Veronica from http://www.vkdesigncompany.com/ was kind enough to make it over for me and I think she did a fantastic job! If you are interested in having a makeover of your blog or just bits and pieces done over, she is a very talented lady with an extremely quick turnaround.

I won this change but will definitely be looking to her as I continue to make additions\changes to my blog in the future. 

Thanks again Veronica!

Suzy's Crafts

Saturday, October 22, 2011

Scrapbook Saturday

Its Scrapbook Saturday over at mycricutcraftroom.blogspot.com. Here is the page I made using Forever Young.


Thanks for stopping by.


Suzy's Crafts

Monday, October 10, 2011

Imagination Monday

Today is Imagination Monday on Erica's Craft Room's blog. For today I have made a scrapbook layout using Enhoy the Seasons. I used pop dots on the individual leaves for some dimension. The tree was cut at 7 inches and the hedgehog at 4 inches. Hope you enjoy!


Stop by http://mycricutcraftroom.blogspot.com/ to see more fabulous projects done with the Imagine.


Thanks for stopping by!


Suzy's Crafts

Wednesday, October 5, 2011

Its Cheer Competition Time...

My 7 year old granddaughter has a cheer competition this weekend. All the parents got a little something to put in their goodie bags they will recieve after the competition. Candy, pens, pencils, lipgloss, etc.  So I decided to make these bookmarks for them. I used Plantin Schoolbook and used my Xyron to run all the letters through. Makes life so much easier. :)  Then using the Plantin Schoolbook cart again, I used the little tag and did a hide contour on the cut out circle. Added a little inking and some glitter. I then ran them through a laminator and used a punch to re-add the cutout. Added some ribbon and Voila ~ 20 bookmarks!  I hope the girls love them. My granddaughter\helper seems to. 


Thanks for stopping by. Hope you have a fantastic day!

Suzy's Crafts

Tuesday, October 4, 2011

Its Card Creating Tuesday Again....

Welcome everyone! Today is Card Creating Tuesday and I have made the following card using the B is for Boys Cartridge.  I cut the Acorn at 3.5 inches and ran the base through the Cuttlebug using the dots folder. I cut the Leaf at 2.75 inches and added a bit a bling I had in my glitter collection. I think it adds a nice little bit of sparkle... I generally use the pre-made cards from Michaels which makes creating cards SO much easier and quicker.  I inked it all up, added some sparkly copper colored fiber and Stamped it with a "Happy Fall Y'all!


Hope you enjoy.


To see what other wonderful projects our other team members have made, check out Erica's  page.  Thanks for stopping by!

Suzy's Crafts

Friday, September 30, 2011

100 Cartridge Blog Hop


Welcome to our 100 Cartridge Blog Hop! You should have come from Erica's Blog, if not, please hop on over there so you don't miss out on any of the fun.


So what is our 100 Cartridge Blog Hope you ask?  Every month, we use at least 100 different Cricut cartridges in projects. Some projects only have one cartridge, some projects have multiple. So take a look around and then click on the link to the next blog which belongs to my friend Courtney and check out the creative and crafty ideas.


For my first project I used French Manor and Storybook.  I just love how this project turned out. 
My daughter recently got married and is doing her bathroom in a Paris Motif. So I wanted to do something a little personal for her. Here are the items used to make it:


The Paper Studio Pearlized Paper - all the paper used was Pearlized. 
Sweet Chelsea Cuttlebug Strip for the border
Tim Holtz Vintage Photo Distressed Ink
Martha Stewart Red & Brown Ink - not sure of the name


I started with a Pearlized Cream Paper and then used the Distressed Ink over the whole sheet. Her bathroom colors are cream and brown and it really turned out a nice shade doing this process. I cut the Eiffel Tower at "Fit to Page" which came out to be 11.5 inches. The Keys were cut at 5 inches and then the name at 2 inches from Storybook.  Pop dots were used to pop it up. All edges were inked using Red and then going back over with Brown...except the borders, I just ran the brown over those. I'm still debating on whether or not to add on a tag with 'Amore" hanging from the keys. I would love your opinion. 
Otherwise, I am very happy with it and plan to head over to Michaels or Hobby Lobby this weekend for a Frame. 


My second project is a card I made using the new Cricut Circle cart Sophie. I am a new Circle Member of last quarter and I adore this cart. 
I actually sat down to make a Holiday Card and ended up with this instead, which turned out perfectly because I have a friend who is going through a difficult time and I think she will like this card. Guess my mind knew what I really wanted. LOL


Here are the items used to make this card:


Prepacked Cards from Michaels - I absolutely LOVE these. Makes everything so easy.
The Paper Studio Pearlized Papers - I was on a roll with these apparently....:)
DCWV The Harvest Gathering Stack - gorgeous paper
Martha Stewart Brown inks
Tim Holtz Distressed Inks


The project is cut at 5 inches and pop dots are used to put most of the pieces together. I added some bling (from my friend Erica) and used some stamps I picked up at a yard sale, I believe. (You can never be to thrifty.) And I think they may even be Stampin Up.


Well that's all I have for you, please take the time to leave a comment or even become a follower. Encouragement is always appreciated.
And don't forget to visit Courtney and all the other fabulous designers creations. I have listed the lineup below in case you get lost. 


Hope you enjoyed yourself! Thanks again for stopping by and Have a FABULOUS DAY! :)


1.      Erica –   http://mycricutcraftroom.blogspot.com
2.      Suzy Crafts - http://suzyssimplecrafts.blogspot..com <--You are here
3.      Courtney Larson - http://craftingwithcourtney.blogspot.com/ <-- GO HERE NEXT
4.      Patricia Holloway -  http://micraftygal.blogspot.com/
5.      Madison Womack – http://funkycards.blogspot.com
6.      Alishia Gaff-  http://alishia-myscrapping.blogspot.com/
7.      Heather Flaherty -  http://www.papercrafteranonymous.com/
8.      Yvette Lopez-  http://gammascreativecorner.blogspot.com
9.      Jen Roseman -  http://memorieswithjen.blogspot.com
11.  Tammy Schmitt -  http://thepurplemuse.blogspot.com
12.  Tina Keller (Crafty and Green)-  http://craftyandgreen.blogspot.com/
13.  Audrey Dickinson (Scrappy EMT)  http://scrappyemt.blogspot.com/
14.  Samantha Sickles -  http://samanthascricutcreations.blogspot.com
16.  Melissa Pinter -  http://pinkpolkadotscrapping.blogspot.com


Suzy's Crafts

Tuesday, September 20, 2011

Its Card Creating Tuesday!

Welcome to Card Creating Tuesday! 


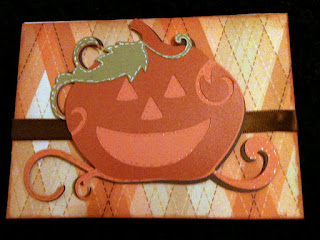
Today I am featured on My Cricut Craft Room's Card Creating Tuesday. I was running late on time, so I quickly put together this cute card using Celebrate with Flourish Lite Cart. I really love this cart. It has so much on it and I have done multiple cards with it.  


I cut the pumpkin at 3.5 inches. I then used some Fall DCWV paper I just purchased (I can't remember the name, but I love it!)  and found some brown ribbon and then added some stitching with a white and orange gel pen. Simple but cute.
(I still can't find my camera, so bear with me on the pictures. )


Well today I have a special treat for you!


I want to feature my guest designer, Miss Seanna. She is my 7 year old granddaughter and she put together this card for her great grandmother who has been sick recently. She also used Celebrate with a Flourish cart and cut her design at 3.5 inches.


We had so much fun designing together. I keep these times close to my heart. :)


To see additional cards created by members of My Cricut Craft Room's Design Team,  stop back by her blog and check out their fabulous projects. I am so lucky to be able to work with such a wonderful group of ladies!


Thanks for stopping by and have a blessed day. :)

Suzy's Crafts

Thursday, September 15, 2011

Welcome to Theme Day Thursday

Today I am featured at http://mycricutcraftroom.blogspot.com/ for Theme Day Thursday.  The Theme today is Baby!

I made this card using B is for Boys cartridge. I added some embossing for the nose, cut the trim out with a Martha Stewart edger I have and added some ribbon. A Quick simple card I put together in about 15 minutes.

Enjoy! And don't forget to check out the other girls projects back at Ericas Craft Room. They  are extremely talented. :)


Suzy's Crafts

Wednesday, September 14, 2011

Its beginning to feel like FALL........

Yes, it is beginning to feel like FALL. The weather here is cool and crisp.  We have already decorated for fall and my house smells like pumpkins. (Love the air freshners from Yankee Candle :)) 

My husband is an avid yard sale person. And he gets awesome things. But it seems whenever I go, I don't find anything. However, last weekend, I came across 2 packs of Stamping up stamps for $2.50 each. So I grabbed them up! 

So here is my first attempt at stamping and coloring it in. Hope you enjoy!


Thanks for stopping by and stop by tomorrow as I am featured http://mycricutcraftroom.blogspot.com/ Theme Day Thursday... 

Suzy's Crafts

Sunday, September 11, 2011

Happy Halloween....?

 Yes, I know it is still a little early, but my mother in law loves the holiday and I thought this might cheer her up. She has been  in the hospital the past week and I made this for her to let her know I know I am thinking of her.

The witch and web were both made from the min monsters cartridge. I am finding  I just love this cart.

I used a 4 by 11 inch premade card I picked up at Hobby Lobby. I folded it in half. I then added some paper I found and a ribbon. I then went the extra step and lined both inside and back also with the paper. It made the card a little thicker, whcih I like alot.

The witch was cut at 3.5 inches and the web I beleive was cute at 2 inches, including the one inside the card. I inked up the edges of the card with some Martha Stewarts ink and then added some purple stickles and a little black to highlight her shoes and hat. And then just popped on some googgly eyes, and I am so happy with it.


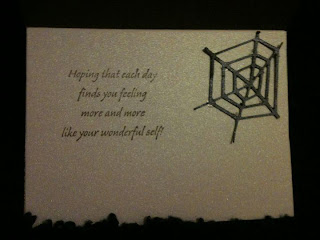
and the inside of the card:


I'm sure it will put a smile on her face. 

Thanks again for taking the time to look.

Suzys Crafts